Get pip, venv, and git:
sudo apt install python3-pip
apt-get install python3-virtualenv
sudo apt install python-is-python3
sudo apt install git
Set up LEMP stack following this tutorial.
Get pip, venv, and git:
sudo apt install python3-pip
apt-get install python3-virtualenv
sudo apt install python-is-python3
sudo apt install gitSet up LEMP stack following this tutorial.
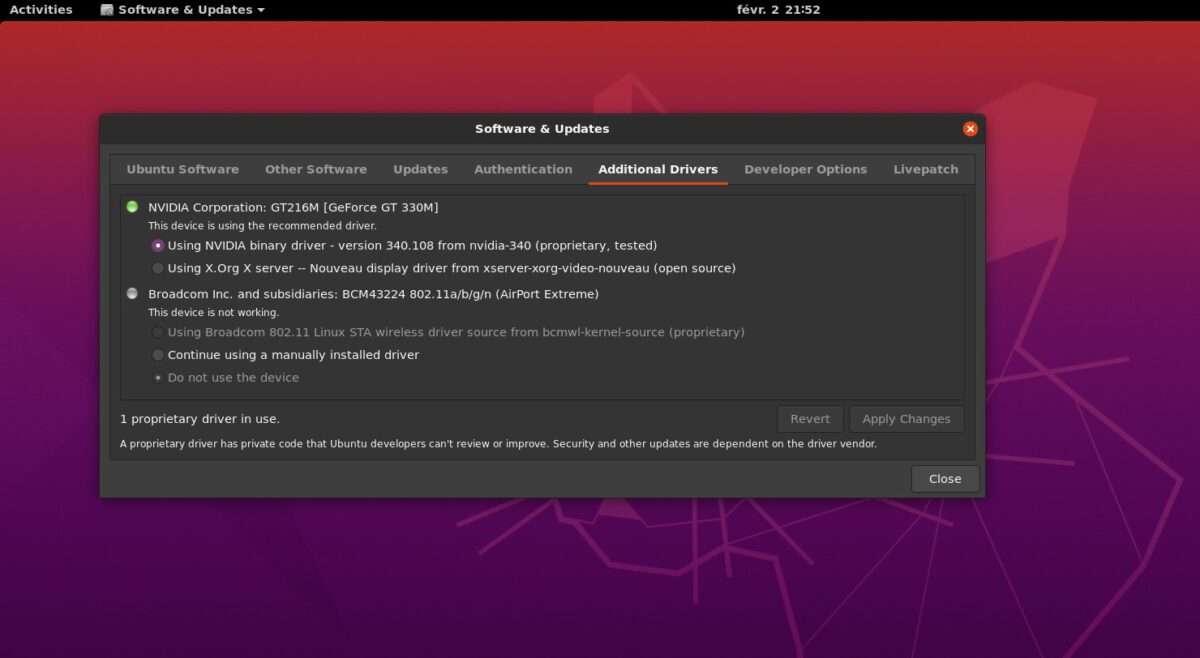
Regularly I got a ‘white noise’ screen after closing/opening the laptop lid without logging out. Apparently that is a graphics driver issue. Luckily there is a simple way to switch over to the proprietary Nvidia driver.
As I was sitting on the coach I wanted to do this via remote desktop from my Windows computer. Also that was quite straightforward.
Still have to test the new graphics driver, though…
And update, one day later:
OUCH. Restart does not work. Everything dead. Not ssh connection. Reboot aborts. Black screen. Need to re-install everything.
SMB is the service that sets your Linux box up as a file server.
Quite a bit seems to have changed in Windows security settings and there are quite a lot of outdated howto ages out there.
I found one tutorial that works… almost.
First find your public IP address:
curl https://ipinfo.io/ipThat way we know what to connect to.
At this point, SSH from phone on 4G with public IP address does not work, whereas it works over wifi using internal IP address.
Next we need to adjust the firewall, following the relevant part of this tutorial.
But that is still not enough:
To find the right port on the right device behind the Ziggo Connect Box, we need to allow port forwarding.
Out-of-the-box, Ziggo has disabled port forwarding. They need to push an update of the firmware in order to enable this. You can ask via twitter @ZiggoSupport, chat or phone 0900-1884. And they fix it the same day (in my case).
Once that is set-up (Check if port forwarding show under “Geavanceerd > Beveiliging” in het Connect Box menu!) follow this tutorial.
And…. BANG. I can get into my own linux box via 5G using (JuiceSSH on my phone).
By the way, after validating that it worked I have upped firewall protection so that I can only access the server from inside my home network.
Installed JuiceSSH client on Samsung phone. Following the reco from here.
On Ubuntu box needed to install openssh-server:
sudo apt-get install openssh-serverAnd net-tools also did not come pre-installed:
sudo apt install net-toolsOnce that is in place, check the IP address like so:
ifconfigOn the Windos laptop I already had Putty installed.
Just to be sure, I added some security measures, following this guide.
The secret key I generated on the client (windows laptop) using Puttygen as explained here https://www.u.tsukuba.ac.jp/en-puttygen-keypair/.
Next step will be to configure the firewall for external access.
always hard to go back to essentials when you want to do cool stuff, but probably wise to invest some time in this.
Day 2 on Ubuntu. Wifi is gone. Apparently a well-known issue on Mac.
Error message when trying to fix:
Errors were encountered while processing:
 bcmwl-kernel-source
E: Sub-process /usr/bin/dpkg returned an error code (1)
Tried a lot of options. In the end this one worked. Whereas question refers to Ubuntu 16.04 the answer mentions Ubuntu 20.04 explicitly.
Distribution: Ubuntu 20.04
Hardware: MacBook Pro 15-inch (mid 2010) that was lying around.
The MacBook Pro “Core i5” 2.4 15-Inch (Mid-2010) is powered by a 32 nm, dual-core 2.4 GHz Intel “Core i5” I5-520M (Arrandale) processor, with dedicated 256k level 2 cache for each core and an 3 MB a level 3 cache. This system also supports “Turbo Boost” — which “automatically boosts the processor speed based on workload” up to 2.93 GHz for this model — and “Hyper Threading” — which allows the system to recognize four “virtual cores” or “threads.”
Best guide I found, works like a charm: https://www.wikihow.com/Install-Ubuntu-Linux#Preparing-to-Install
Best thing: I can also boost RAM from 4G to 8G. More about that later.
Worst thing: the CPU is not modern enough for most machine learning tasks (as shown here).